 vite
vite
# vite的使用
# 全局安装vitejs
<font style="color:rgb(51, 51, 51);background-color:rgb(248, 248, 248);">npm install vite -g</font>
# 查看安装vite版本
<font style="color:rgb(51, 51, 51);background-color:rgb(248, 248, 248);">vite -v</font>; // vite/3.2.5 darwin-x64 node-v14.20.0
# vite创建项目
npm init @vitejs/app
# - 项目支持jsx
安装插件@vitejs/plugin-vue-jsx
yarn add -D @vitejs/plugin-vue-jsx;
# 在vite.config.js文件中,添加该插件的使用
import { defineConfig } from 'vite'
import vue from '@vitejs/plugin-vue'
import vueJsx from "@vitejs/plugin-vue-jsx"

export default defineConfig({
  plugins: [vue(), vueJsx()]
})
2
3
4
5
6
7
# 创建App.jsx文件,替换现在首页
import { defineComponent } from "vue";

export default defineComponent({
  setup() {
    return () => {
      return <div>vite jsx!</div>;
    };
  },
});
2
3
4
5
6
7
8
9
修改main.js的引入路径
import { createApp } from 'vue'
// import App from './App.vue'
import App from "./App"

createApp(App).mount('#app')
2
3
4
5
# - 项目支持vue2
可以参考官方 插件https://cn.vitejs.dev/guide/features.html#vue (opens new window)
- Vue 3 单文件组件支持:@vitejs/plugin-vue (opens new window)
- Vue 3 JSX 支持:@vitejs/plugin-vue-jsx (opens new window)
- Vue 2.7 支持:vitejs/vite-plugin-vue2 (opens new window)
- Vue <2.7 的支持:underfin/vite-plugin-vue2 (opens new window)
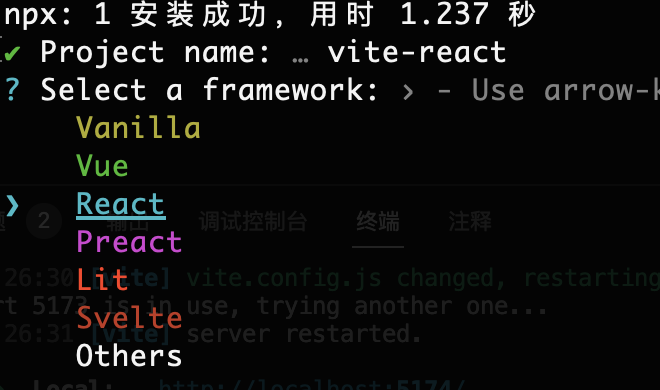
# - 项目支持react
需要使用插件 @vitejs/plugin-react解析react项目
在创建项目时,选择react,就可以创建一个支持react的项目。
npm init vite@latest
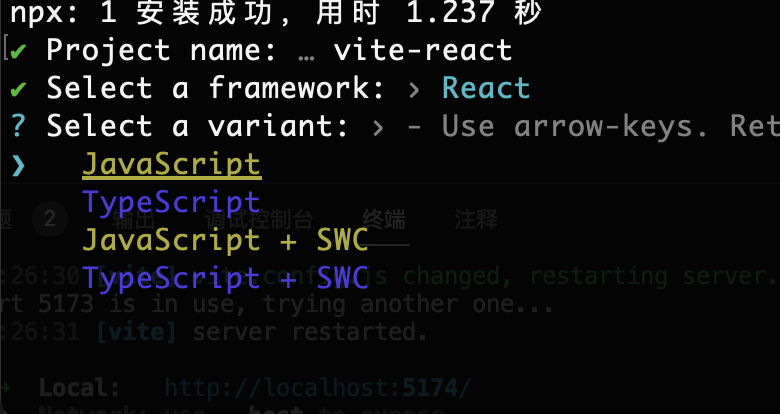
# - 项目支持ts
创建项目时,选择支持typescript。
# tsconfig.json
{
  "compilerOptions": {
    "target": "ESNext",
    "useDefineForClassFields": true,
    "module": "ESNext",
    "moduleResolution": "Node",
    "strict": true,
    "jsx": "preserve",
    "resolveJsonModule": true,
    "isolatedModules": true,
    "esModuleInterop": true,
    "lib": ["ESNext", "DOM"],
    "types": ["vite/client"],
    "skipLibCheck": true,
    "noEmit": true
  },
  "include": ["src/**/*.ts", "src/**/*.d.ts", "src/**/*.tsx", "src/**/*.vue"],
  "references": [{ "path": "./tsconfig.node.json" }]
}
2
3
4
5
6
7
8
9
10
11
12
13
14
15
16
17
18
19
# -项目中引入静态文件
- url
- raw
- webworker
import logo from "./assets/logo.png";
# url直接引用静态资源文件
import logo from "./assets/logo.png?url";
console.log(logo); //  返回的是url路径/src/assets/logo.png
2
# raw将文件源码引入
会将引入的文件源码进行打印
let a = 1;
console.log(a);
2
import txt from "./txt.js?raw"
console.log(txt); // let a = 1; console.log(a);
2
# webworker开启worker多线程
let i = 0;
const timeCounter = ()=>{
    i = i+1;
    postMessage(i);
    setTimeout(timeCounter, 2000);
}

timeCounter();
2
3
4
5
6
7
8
import { createApp } from 'vue'
import './style.css'
import App from './App.vue'

import Worker from './worker?worker'
const worker = new Worker();

worker.onmessage = function(e){
    console.log(e);
}

createApp(App).mount('#app')
2
3
4
5
6
7
8
9
10
11
12
# - 项目集成eslint和prettier
添加依赖:eslint、eslint-plugin-vue、@vue/eslint-config-prettier、@rushstack/eslint-patch
# 新建.eslintrc.cjs文件
/* eslint-env node */
require("@rushstack/eslint-patch/modern-module-resolution");

module.exports = {
  root: true,
  extends: [
    "plugin:vue/vue3-essential",
    "eslint:recommended",
    "@vue/eslint-config-prettier",
  ],
  parserOptions: {
    ecmaVersion: "latest",
  },
};
2
3
4
5
6
7
8
9
10
11
12
13
14
在package.json中定义
"scripts":{
  "lint": "eslint . --ext .vue,.js,.jsx,.cjs,.mjs --fix --ignore-path .gitignore"
}
2
3
# 添加prettier
安装依赖: prettier
创建.prettierrc规范配置文件
module.exports = {
  // 字符串使用单引号
  singleQuote: true,
  // 每行末尾自动添加分号
  semi: true,
  // tab缩进大小,默认为2
  tabWidth: 2,
  // 使用tab缩进,默认false
  useTabs: false,
  // 对象中打印空格 默认true
  // true: { foo: bar }
  // false: {foo: bar}
  bracketSpacing: true,
  // 箭头函数参数括号 默认avoid 可选 avoid| always
  // avoid 能省略括号的时候就省略 例如x => x
  // always 总是有括号
  arrowParens: 'avoid',
  // 换行长度,默认80
  printWidth: 80,

  // 设置为true时,将多行JSX元素的 > 放在最后一行的末尾,而不是单独放在下一行
  jsxBracketSameLine: true
  /*
    <button
       className="prettier-class"
       id="prettier-id"
       onClick={this.handleClick}>
       Click Here
    </button>
     */
  // 设置为false时
  /*
    <button
        className="prettier-class"
        id="prettier-id"
        onClick={this.handleClick}
    >
        Click Here
    </button>
     */
};
2
3
4
5
6
7
8
9
10
11
12
13
14
15
16
17
18
19
20
21
22
23
24
25
26
27
28
29
30
31
32
33
34
35
36
37
38
39
40
41
# 添加husky,提交代码前进行规范校验
// 安装husky依赖
$ yarn add -D husky

// 执行husky,在当前项目下创建出.husky目录,【注意前提是先创建git仓库】
$ npx husky install

// 添加提交代码前要执行的命令
$ npx husky add .husky/pre-commit "npm run lint"
2
3
4
5
6
7
8
# -项目的env环境变量
# 可以定义.env文件,在该文件中定义全局环境变量
VITE_TITLE="development"
VITE_NAME="test"
2
注意:变量必须以VITE_开头。
# 定义多环境中变量不同值
- .env.development 开发环境
- .env.production 生产环境,需要执行npm run build
- .env.test 通过vite的 --mode 指定启动的模式,在
package.json的
"scripts": {
  "dev": "vite --mode test"
}
2
3
# - glob-import批量导入文件功能
项目开发中,有时想将文件夹下的所有文件都进行导入,可以使用 import.meta.glob功能。
在目录下创建mock目录,并创建user.json、table.json、department.json、utils.js
// 一次全部导入mock下的所有文件
const mockData = import.meta.glob("./mock/*");
console.log(mockData);
// 如果只导入json
const mockData = import.meta.glob("./mock/*.json");
2
3
4
5
# vite.config.js配置
import { defineConfig } from 'vite'
import vue from '@vitejs/plugin-vue'
// 支持jsx
import vueJsx from "@vitejs/plugin-vue-jsx"

export default defineConfig({
  plugins: [vue(), vueJsx()],
  resolve: {
    //配置alias别名,可以缩短引入文件时的路径
    alias: {
      "@": "/src",
      "@style": "/src/style",
    },
  },
})
2
3
4
5
6
7
8
9
10
11
12
13
14
15
# vite插件的使用
开发一个插入js文件到index.html中head标签中的插件
export const insertScriptPlugin =  (options) => {
  return {
    name: 'insert-script',
    config({ mode }) {
        process.env.VITE_MODE = mode;
    },
    transformIndexHtml(html) {
      const env = process.env.VITE_MODE
      const scriptUrl = options[env || 'production'];
      if (!scriptUrl) {
        return html;
      }

      const scriptTag = `<script async src="${scriptUrl}"></script>`;
      const headEndIndex = html.indexOf('</head>');
      if (headEndIndex !== -1) {
        // 在 </head> 标签之前插入 script 标签
        return html.slice(0, headEndIndex) + scriptTag + html.slice(headEndIndex);
      } else {
        return html;
      }
    },
  };
}
2
3
4
5
6
7
8
9
10
11
12
13
14
15
16
17
18
19
20
21
22
23
24
然后在vite.config.js中使用
export default ({ command, mode }: ConfigEnv): UserConfig => {
  const isBuild = command === 'build';
  console.log(command, mode);
  let base = '/api';
  return {
    base,
    plugins: [vue(),
              vueJsx(),
              insertScriptPlugin({test: 'test.js', prod: 'prod.js'})],
  }
}
2
3
4
5
6
7
8
9
10
11